Friday, February 28, 2014

The Playroom - Beginning

So we finally have most of the basement set up the way we want it.  We also use this room for the daycare playroom, so organized is best!  This is just the beginning stages of the basement.  Eventually I would like to have more artwork, kids sayings, pictures, etc. hanging around to make it a true children's place to be.

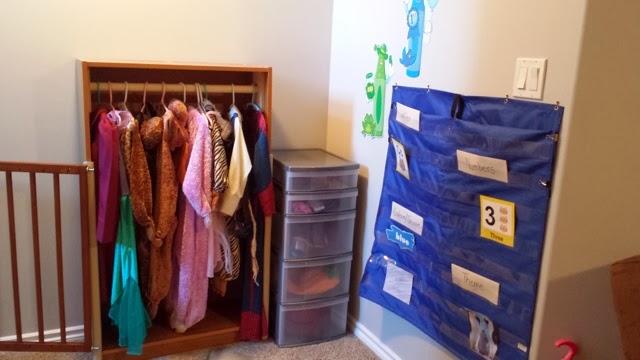
So this is our Circle Time and dress up area.  My husband made the dress up closet a couple of years ago using an old bookshelf and a wooden rod.  He's so handy!  You can check out how he made it here in this blog post!  In the chest of plastic drawers beside the closet is the dress up hats, necklaces/bracelets, shoes and cell phones (we have about 8 of them).  In this area (but out of the picture) we also have a kitchen, play food, stroller, crib with dolls and a dress up box with clothes that cannot be hung, purses and other dress up stuff that does not fit in the drawers.


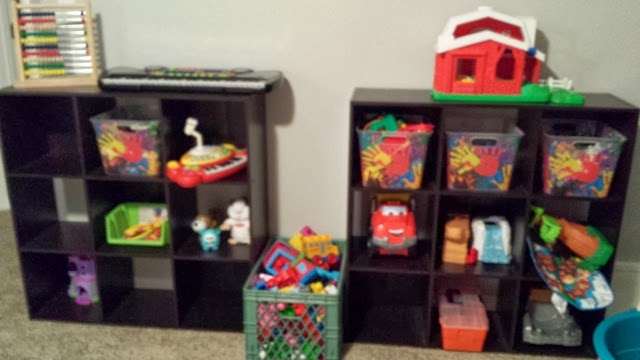
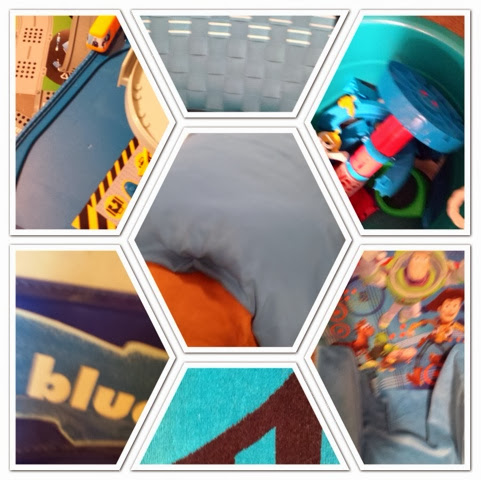
This is the toy space.  I buy lots of baskets when I see them on sale from Walmart, Target and even the Dollar Store.  I try to keep it organized.  My kids are really good at putting things back where they go, I just have to teach the daycare kids the same system and we should be good to go!


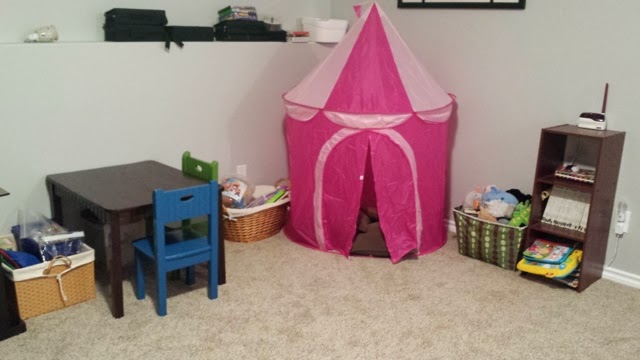
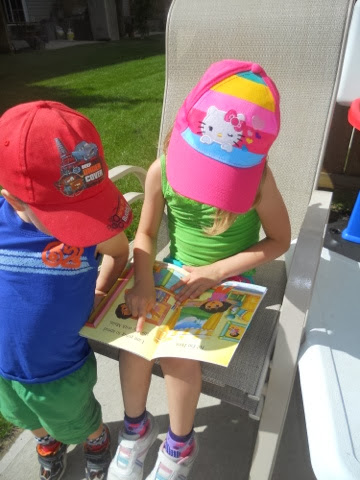
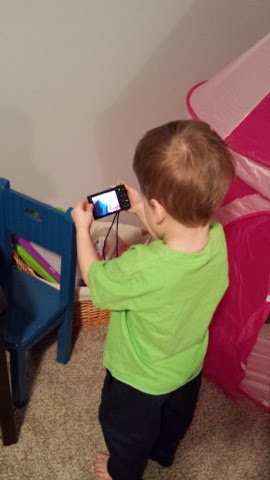
This is the quiet corner.  The table and chairs are used to make puzzles (basket on the left) or to play with quiet toys (basket on the right) like Magna Doodles, Potato Heads, Lacing Cards, etc.  The tent has pillows to make a cozy reading nook (books are on the far right of the picture) and of course the puppets.  They are kind of used as both stuffed animals to read or cuddle with and to put on puppet shows when the ideas arise!


So there you have it, the beginning stages of our playroom!  I hope to have this area finished in the next year or so, but that being said, there are a LOT of other things on my to do list that are more important.  So we will just wait and see I guess . . .


Thursday, February 27, 2014

Family Frames

I saw a photo collage similar to this on Pinterest and I thought, "If I ever move . . ." well, we did so I made my mom help me and we put up this awesome photo collage in the Living Room for everyone to see!

I made most of these pictures right here on the blog, so I will quickly link back to them if you see something that you like!


Wednesday, February 26, 2014

Daycare Hand Towels


Disclaimer: I AM NOT A SEWER, I HAVE NEVER BEEN A SEWER AND I DOUBT I EVER WILL BE A SEWER!

So with the daycare having a variety of little ones, with runny noses, dirty hands and many other kid germs - each child NEEDS to have there own hand towel.  Face clothes are used once and then thrown in the wash, but hand towels can be used at LEAST for one whole day, if not more.  Depending.

So I went to the Dollar Store and I bought many different coloured hand towels.  Each child will get a colour so that they always know which towel is theirs.  I also bought some simple ribbon.  I started (see the first one, not that you need help to distinguish) by sewing the ribbon onto the towel.  I was getting frustrated (to say the least) so my very patient husband suggested I just tie the ribbons onto the tags because tags are meant to stay on tight.  GREAT IDEA HONEY!  So yes, the ribbon may come undone in the washer . . . but it will be WAY easier to TIE another ribbon on then to SEW another ribbon on, because let's be honest.  The sewn ribbon is going to come off too eventually, because I SUCK at sewing!


My horrible sew job.


Ahhh, that's better!


Just a simple knot.


And the finished product.  The kids have been using it really well.  Even the two year olds are able to recognize their colour and use ONLY their hand towel to stop the spread of unwanted germs!


Tuesday, February 25, 2014

Name marshmallows and shape sorting

Fine motor and letter recognition project. I printed my sons name on a piece of thick paper and then he used white glue to draw over top of the letters in his name. Once the glue was on the letters, he carefully placed marshmallows along the glue lines.  Older children may be able to print their own names.


Gross motor shape sorting activity. Today we worked on sorting our shapes. I drew shapes using masking tape on the floor.  We then used foam shapes and he put the shapes in their corresponding tape shape on the floor.


Books We Use This Week

The "How Do Dinosaurs . . ." series by Jane Hyatt Yolan
Dinosaurs, Dinosaurs by Byron Barton
Drumheller Dinosaur Dance by Robert Heidbreder
Dinosaur Kisses by David Ezra Stein
I'm Sure I Saw a Dinosaur by Jeanne Willis


Monday, February 24, 2014

Dinosaur Week


Yay for Dinosaur Week!


File folder games. I made these games about 10 years ago when I first started taking education classes in university.  They are very basic and easy to make. Plant eaters vs meat eaters. Today vs Dino days.  Some of the pictures of dinosaurs were hard for him to distinguish. If I were to make this game again, I would definitely use better pictures for classification.


Making bones. A very simple craft. I cut out the shape of a bone and gave my son toilet paper and a bowl filled with a mixture of glue and water.  He ripped pieces of toilet paper, dipped them into the glue/water mixture and then put the wet toilet paper onto the cardboard bone.


Number and alphabetical order. I photocopied dinosaur pictures and wrote the letters and numbers that we have covered so far. He then put the dinosaurs in order. You could also use lowercase letters or number words.


The Dino sensory bin. From the dollar store, I bought some green stones, blue stones and rocks. The green represented grass and the blue water. I set up this bin for the kids after school one day and they had a blast making different scenes with the rocks and dinosaurs.


Our cooking experience. Eggo Dino's. 
All you need are apples, bananas, an Eggo and marshmallows.  This is a great opportunity for your child to gain experience with a knife.  Adult supervision is always required.


We made some dinosaur footprints to add to our dramatic play area. A simple craft using cardboard and duct tape. I drew two footprints and then used to rectangular piece as the foot holder.  We curved the rectangluar piece and duct taped it to the bottom of the footprint.  Voila!


More arts and crafts. Using only our hands and fingers, we made dinosaurs!  And just a reminder, if your bathtub is close enough, it makes a way better sink then a regular sink. Less mess is always great!


Science: Making Fossils with Playdough
Using black and brown playdough, we used the cookie cutters closest to prehistoric animals as we could find.  Once they cut out the animals, they used cotton swabs (cutting them if they needed) to make "bones" on the bodies.


Thursday, February 20, 2014

Home Made Valentines


1. Find the Valentines to print out here!  What a great template!  Black and White or Colour available!
2. Find some glow sticks from the Dollar Store.
3. Cut out the Valentines and hole punch where the circles are
4. Put the other child's name on the line and sign your name on the back!

Super easy, super cheap and lots of fun!

Wednesday, February 19, 2014

Clipping Carabineers

We were so busy this week with Valentines Day activities, that we didn't do much "out of theme learning".  However, we did take some time to sit down and clip together some carabineers.  This is a great quiet time activity!  I bought the carabineers in three packs from the Dollar Store - three different sizes - and the kids clipped them together.  Once they were clipped together, they made great noise makers (great for entertaining a really little one).


Books That We Used This Week
The Best Thing About Valentines by Eleanor Hudson
Valentine Surprise by Quinlan B. Lee
Tucker's Valentine by Leslie McGuirk
Rose Are Pink, Your Feet Really Stink by Diane de Groat
The Valentine Express by Nancy Elizabeth Wallace
If You'll Be My Valentine by Cynthia Rylant
A String of Hearts by Laura Malone Elliott

Tuesday, February 18, 2014

Valentines Week


Happy Valentines Week!


Literacy:
A simple 8 page book with a Valentines Day Poem.  We worked together to cut it our, read it together and then coloured the pages.  He was so proud of his reading, he read it to his dad and his big sister when they got home.


Sensory: Valentine Soup
Water mixed with some red food colouring to make pink water and I added in some foam sticker hearts from the Dollar Store.  I gave them plenty of kitchen tools and they kept busy for almost an hour.  Funnels, strainers, ladles, mixing spoons, measuring cups and spoons, bowls and cups. 


Literacy & Sensory:
This week we added some red food colouring to our shaving cream bin and sprinkled in some foam sticker hearts from the Dollar Store.  They drew their names, other letters, numbers and many shapes.


Valentines Day Poem:
Five Little Valentines
Five little Valentines were having a race
The first one was covered in lace
The second one had a funny face
The third one said, "I love you"
The fourth one said, "I do too!"
The fifth one was sly as a fox
And he ran the fastest to your Valentines box


Literacy:
Lowercase alphabetical order on candy heart shapes.  This activity was more challenging for my little guy, he did mix up the b and the d, however when I pointed it out, he quickly fixed his mistake.


Math:
I printed the numbers on the candy heart shapes and he used small foam sticker hears from the Dollar Store to count our how many hearts he needed.


Baking:
We made simple heart shapes sugar cookies.  We baked the cookies and once they were cool enough, we made some icing and finished them off.  We use paintbrushes to ice cookies because it is easier to spread the icing compared to using a knife.  Here are the recipes that we used!

Cookies
1/2lb butter, softened
2 1/2 c. flour
1c. white sugar
1tbsp milk
1tsp vanilla

PREHEAT OVEN TO 325F

1. Mix the butter until it's light and creamy.  Add the remaining of the ingredients.
2. Knead the dough until it's smooth.
3. Sprinkle some flour on the table and roll out the dough (you may want to do a third of the dough at a time) until it's approximately 1/4 inch thick.
4. Use a heart shaped cookie cutter and place them on a cookie sheet covered in parchment paper.
5. Bake for 12-15 minutes or until light brown on the bottom.


Icing
Experiment with the ratios - YOU DON'T NEED MUCH MILK
Icing Sugar (1 cup)
Milk or Water (1tbsp)
Artificial Almond Flavouring (1tsp)
Red Food Colouring (a couple drops)


Craft: Coffee Filter Hearts
1. Cut a heart out of a coffee filter.  Use whatever size you have.
2. Get your child to draw lines and other shapes using different colours all over the filter.
3. Using a paint brush and a cup of water, the child paints water all over the filter to make the colours bleed together.
4. Allow filters to dry on a piece of paper.


Super Fun: A Valentines Day Treasure Hunt
I blew up some balloons the night before and wrote on the balloons different clues to guide the kids on a hunt.  Once I had written on the balloon, I let out the air so that they would be easier to hide.  When they found a balloon, I would blow it up so that they could read the clue easier.


Gross Motor:
We played MANY fun games of "Musical Hearts".  I simply cut heart shapes out of a piece of construction paper and we turned on the music and had a blast!  We laughed hard, fell hard and of course, played hard!


Friday, February 14, 2014

Thursday, February 13, 2014

Challenge to Read 100 Books

Even though I am a teacher and know how to teach reading, it always amazes me how a child can go from having no clue to reading books on their own.  That was my daughter this summer between Kindergarten and Grade One.  She was learning so much and so fast it was hard to keep up with her!  She loved reading and still does!
So to keep her love of reading alive - and try to avoid her forgetting everything her teacher had taught her - I came across this list and we made it our summer goal to finish it.  We never did get through the whole list.  I think we read in most of the spots, but we forgot to check them off with how busy we were this summer.
If I have some time, I may actually make up a winter book list to see if we can continue all the reading through the boring winter days that come with living in Canada.
If your child struggles with reading or just doesn't like it, try using this fun list or make up a list of your own that suits your child.  It may just get them interested enough to give them a running start.


Wednesday, February 12, 2014

Clean Finger Painting and colour hunt

Literacy and fine motor. I put a little bit of paint in each baggie so that my son could practice drawing shapes, letters and numbers with his finger.  Just a different way of practicing literacy and numeracy without a pencil.


Homework time. We had a special guest one day this week during circle time. My daughter had a day off school so she joined us.  She now has her own binder with worksheets that will help with her reading, printing and basic math skills.


Hunt for the colour blue. I gave a camera to my son so that he could go around the house and take pictures of everything blue that he could find. I think he just might grow up to be a photographer.


Books Used This Week
Ten Grouchy Groundhogs by Kathryn Heling
Groundhog Day by Gail Gibbons
Substitute Groundhog by Pat Miller
Groundhog Day by Margaret McNamara
Secret of the First One Up by Iris Hiskey Arno


Plus some non-fiction ones from the library.