Enjoy!
Friday, January 31, 2014
52 ECE Themes
Want some Early Childhood Education Themes for your daycare or preschool classroom? Here are 52 that I put together with the months and weeks. They will change, obviously, depending on the year. At the end, there are 4 extra themes and that's because there are some months in the year with more than 4 weeks - but that always changes!
Thursday, January 30, 2014
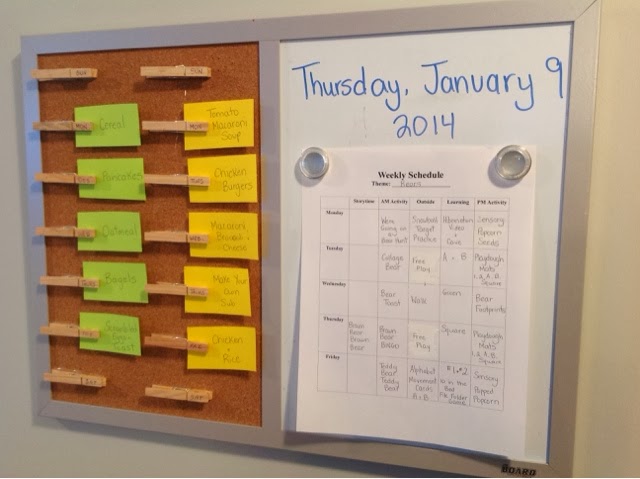
Menu and Daycare Planning
Every Monday when the parents come in to drop of the children, this menu and weekly schedule is posted by the cubbies. You can see how I made this menu board here because I made it a couple of years ago to use for my family. I used it often, but I think it will be more helpful now with the daycare. Also, if you would like to use my weekly schedule, you can check it out below and use it as you wish! If you do, all I ask is that you leave a quick comment and if you use it on your blog or other page, please reference back to my site! It's all about sharing my friends!
Also, if you check back tomorrow, I will have my list up that has 52 themes for the entire year!
Wednesday, January 29, 2014
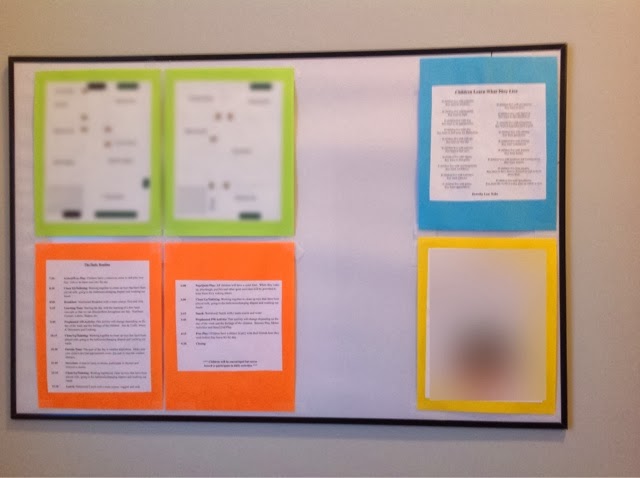
Family Communication Board
Open communication between myself and parents (whether in the classroom or in the daycare) is my number one priority. I want the parents to feel like they are a part of my family because they are trusting me with their number one treasure every single day.
Using Open Office (a free version of the Word or Excel programs, yet still compatible with all the major programs that you pay for), I created a house plan to show fire routes (on the green background), our daily schedule (on the orange background - also see below), my favourite poem (blue background) and an All About Me page with a family pictures at the bottom (yellow background).

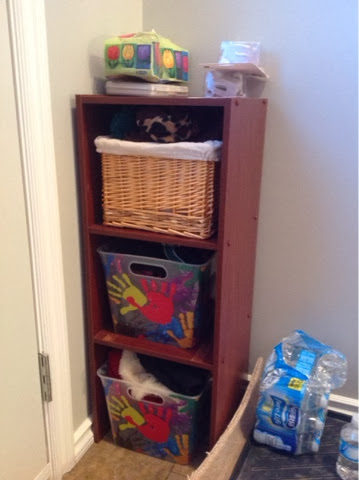
And did you notice what else made the trip and has a spot in the front entrance? Our three basket accessory holder! Everyone (except the husband, because he's too cool for this) has a basket for our outdoor accessories (mitts and toques in the winter, hats and sunglasses in the summer). Check out my old post for more info!
Using Open Office (a free version of the Word or Excel programs, yet still compatible with all the major programs that you pay for), I created a house plan to show fire routes (on the green background), our daily schedule (on the orange background - also see below), my favourite poem (blue background) and an All About Me page with a family pictures at the bottom (yellow background).
And did you notice what else made the trip and has a spot in the front entrance? Our three basket accessory holder! Everyone (except the husband, because he's too cool for this) has a basket for our outdoor accessories (mitts and toques in the winter, hats and sunglasses in the summer). Check out my old post for more info!
Tuesday, January 28, 2014
Circle Time Journal
This journal quickly became a part of our everyday Circle Time Routine at home. It is very easy to make - using Open Office or Word - add some charts and you'll be ready to go.
It also has a lot of learning in one little page.
First, the child gets to practice printing their name EVERY DAY. Please always remember to teacher you child to print their name properly. It's Jim. Not JIM. I only say this because I made this mistake as a parent with my daughter and when she got to Kindergarten she had to relearn how to print her name.
The next learning comes with the days of the week. You can teach this by repetition, doing it every.single.day., or you can turn it into a fun song.
Now comes the small motor, math and literacy. This is the beginner Circle Time Journal (as my son grows and gets used to this, I will make something a little bit harder) so there is practice with printing letters, numbers, colouring and drawing shapes.

And finally, the child learns a little bit about weather every day and colours in the picture that best suits what they see. This part of the activity can quickly take your day in a whole new direction if they come up with questions in regards to the weather or see something that they like out the window. You know, rain, snow, mud . . .
Circle Time Journal
It also has a lot of learning in one little page.
First, the child gets to practice printing their name EVERY DAY. Please always remember to teacher you child to print their name properly. It's Jim. Not JIM. I only say this because I made this mistake as a parent with my daughter and when she got to Kindergarten she had to relearn how to print her name.
The next learning comes with the days of the week. You can teach this by repetition, doing it every.single.day., or you can turn it into a fun song.
Now comes the small motor, math and literacy. This is the beginner Circle Time Journal (as my son grows and gets used to this, I will make something a little bit harder) so there is practice with printing letters, numbers, colouring and drawing shapes.
And finally, the child learns a little bit about weather every day and colours in the picture that best suits what they see. This part of the activity can quickly take your day in a whole new direction if they come up with questions in regards to the weather or see something that they like out the window. You know, rain, snow, mud . . .
Circle Time Journal
Monday, January 27, 2014
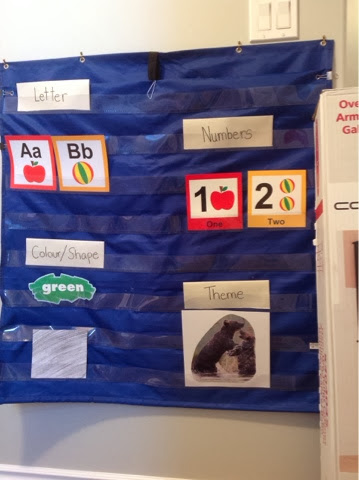
Circle Time Area
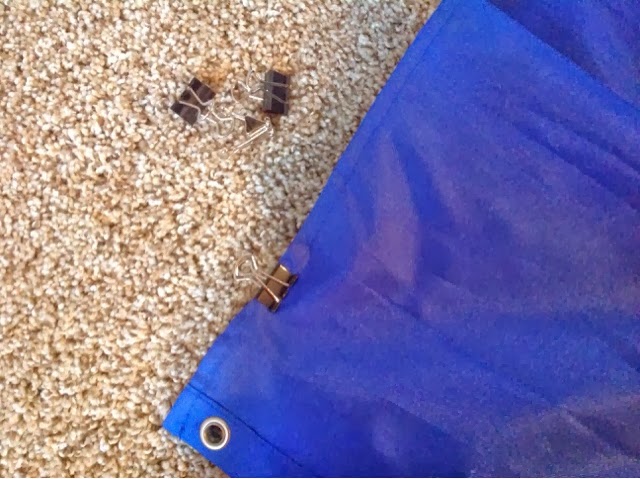
This is a close up of our Circle Time Chart. I combined a few ideas that I found on Pinterest and came up with something simple for mine. One thing I did need however, was for the pocket chart to be shorter. I wanted it to fit UNDER the light switch, but it would then drag on the floor. I then though about just folding it and hammering it into the wall that way. But two problems with that. 1. I would put holes in my chart. 2. It wouldn't be as strong as I would want. I needed the reinforced holes.

So I laid the chart on the ground and found 4 binder clips. I then folded the chart to bring it up about two rows. Next, I used two binder clips on each side to hold the chart in place. After I hung the chart, I noticed that it sagged a little in the middle, so I grabbed a large paper clip (Ideal Clamp) and attached the middle of the chart to the black Velcro hanger. DONE!
Friday, January 24, 2014
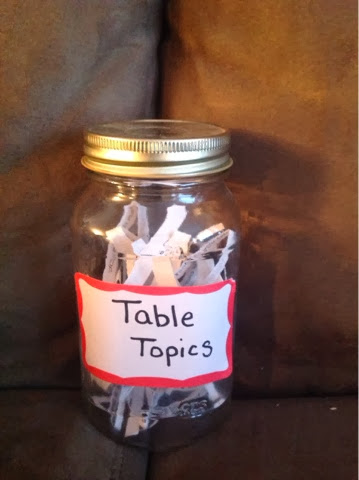
Table Topics
I love this idea! It's an activity that can get our kids talking at the kitchen table - on a topic OTHER than the dreaded poop, pee and other gross topics that they ALWAYS seem to come up with. Every month this blog will provide you with 30 or 31 topics to discuss at the supper table! All I did was find a mason jar, cut up the strips and we were ready to go!
Have fun!
Thursday, January 23, 2014
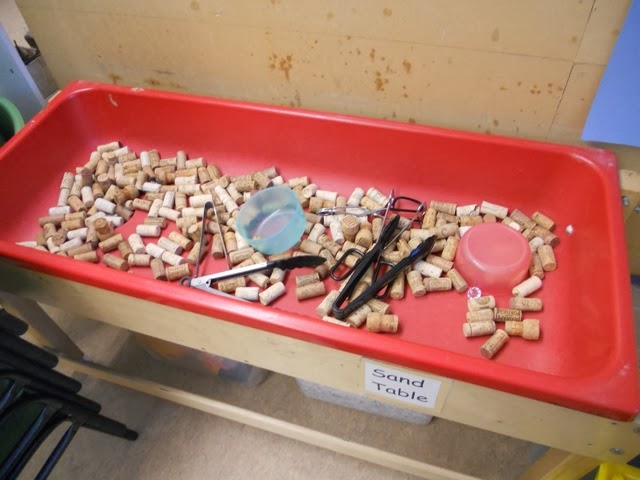
Wine Corks and Tongs
This post goes back to when I was still teaching in the classroom, but I still have the wine corks and plan on doing this again with my daycare kids. I collected a variety of tongs - small, medium, big, plastic and metal - and then put them in the sensory box together with some containers and the kids had a great time moving the corks from one container to another and trying to stack them. I love this sensory box!
Wednesday, January 22, 2014
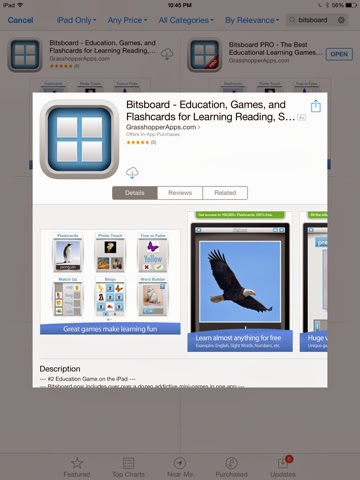
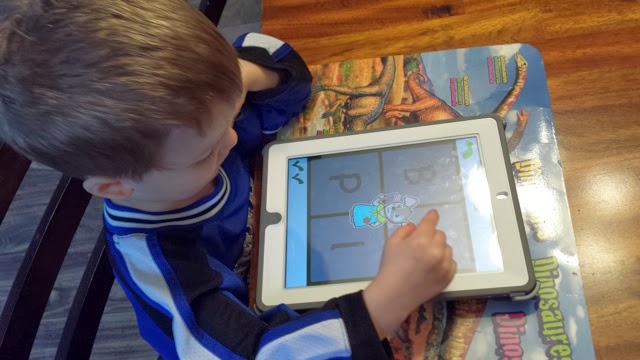
App of the Week
So last week I shared with you all an app that helped me keep my sanity while moving. Today I want to share with you another app (free of course - however there is a paid version, but if you watch, it is temporarily free on apps fire - that's the one that I grabbed) that is my favourite learning tool with the kids.
It's called Bitsboard. You can make different accounts with different boards for each of your children.
A board is a topic that your child is currently learning. They have boards for animal sounds for babies, three letter words for readers, simple sentences for readers or ESL, telling time, money, letters, numbers, etc. The list goes on and on and on!
Once the boards (you can have many different boards) are loaded onto the account, your child gets to play! There are many different games for each board. They include flashcards (most simple), explore, photo touch (app names an item, child finds it), true or false (app names an item, child picks true or false), memory game, pop quiz (app gives picture and then word choices for child to pick from), match up (pictures on one side, words on the other), word builder (picture with mixed up letters so child learns how to spell), spelling bee (picture with no letter options, just a keyboard for child to type), BINGO game, reader (word and choice of pictures for child to match word to picture - no sound from the app) and photo hunt.
I totally recommend this app to anyone with children - of any age! It's so versatile that it's fun for ALL ages!
Enjoy!
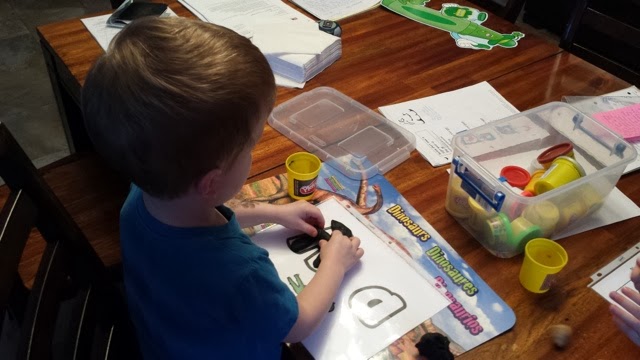
Tuesday, January 21, 2014
Playdough mats and Letter Magna Doodle
This week our focus was
A a B b
Green
Square
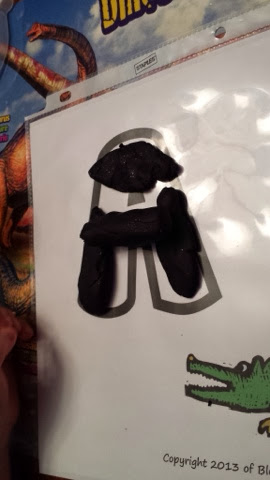
Here are a few of the learning ideas that we did this week . . .
We used playdough mats. I printed off shapes, letters (upper and lower case) and numbers (counting and the numeral). Both of the kids had a great time with this activity two different days this week after school.
You can find the pintable's here:
And instead of laminating all of the pages (because money is tight and we don't have access to a free laminator), I used page protectors. I did not tape the ends closed, but I'm sure you could if you wanted! It keeps the paper safe and you can easily store the pages in a binder without using a hole punch.
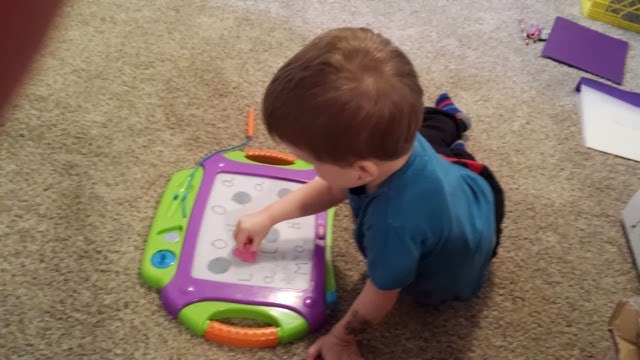
Find the Letter!
We used the Magna Doodle and I printed upper and lower case A's and B's all over. First I did JUST A's or JUST B's and then I started to add other letters to make him look a little harder. Once I had printed the letters, he would use the square magnet to cover the uppercase letters and the triangle magnet to cover the lowercase. He was a master and sped through it real quick - but he wanted to keep playing it over and over and over again.
We talked about a square and how many sides it had. He then pointed out that it also had four "pointy sides" which I explained were corners. I had a handful of popsicle sticks in front of us, many different colours - but only the yellow had four sticks. The rest had more or less. It was now his job to build a square using all of one colour. It took him a while and he tried and tried, but eventually he figured out that he should count first and THEN build. Once he built it, I wrote on each popsicle stick with a marker. We will do this for every shape until we have a full collection!

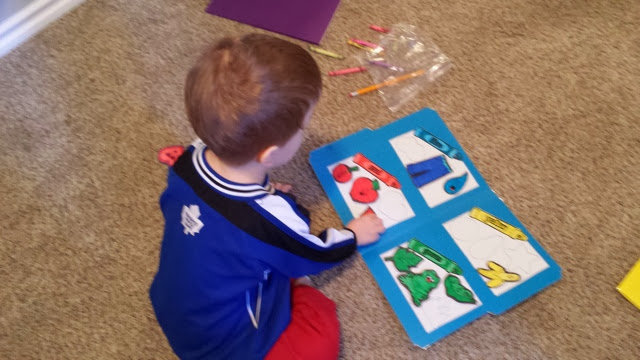
This was a sorting by colour file folder game. Again, I am unsure of what the original source is, so please leave a comment to I can add it in later on!
This concept is way to easy for my son, however his speech is somewhat of a concern right now, so I used this activity more as a speech tool than anything else. I wanted him to make complete sentences and pronounce the words correctly.
It began with me saying a sentence and him listening and placing the picture. Then he started to repeat and eventually I stopped saying anything and he would make the complete sentences on his own. He even used "is" and "are" appropriately without help, which was wonderful!
Book List for the Week
Goldilocks and the Three Bears
Brown Bear, Brown Bear by Bill Martin Jr.
Where's My Teddy by Jez Alborough
We're Going on a Bear Hunt by Michael Rosen
Plus many non-fiction books about different types of bears.
Monday, January 20, 2014
Bear Week
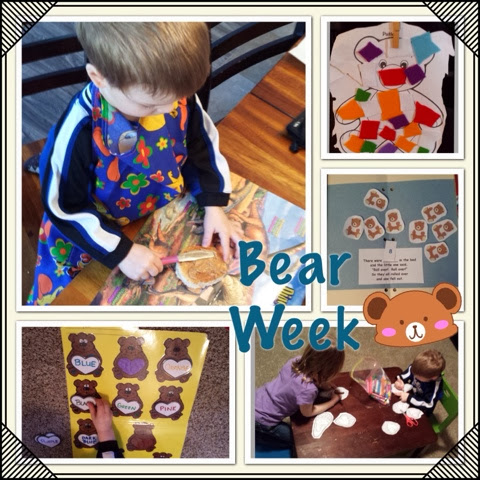
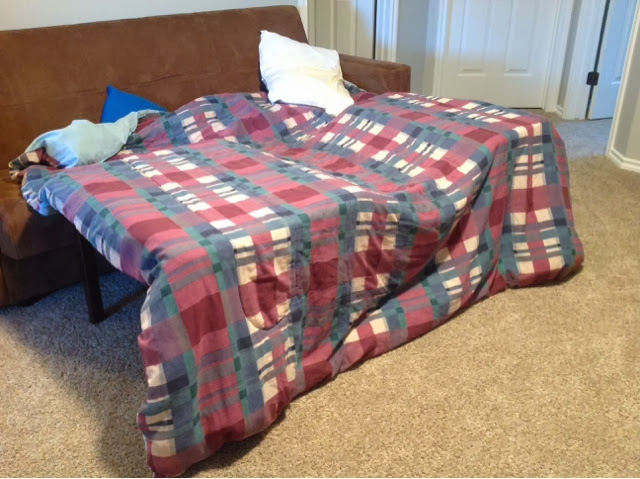
Welcome to Bear Week! I made sure that we had a great picture (cut from a magazine) to put under the Theme Heading at our Circle Time area. We talked about that picture every single day. On the first day (no pictures) we talked about hibernation and watched a few videos from YouTube. We just did a quick search on the site and found a couple of cartoons plus a couple real bears hibernating. He loved it!
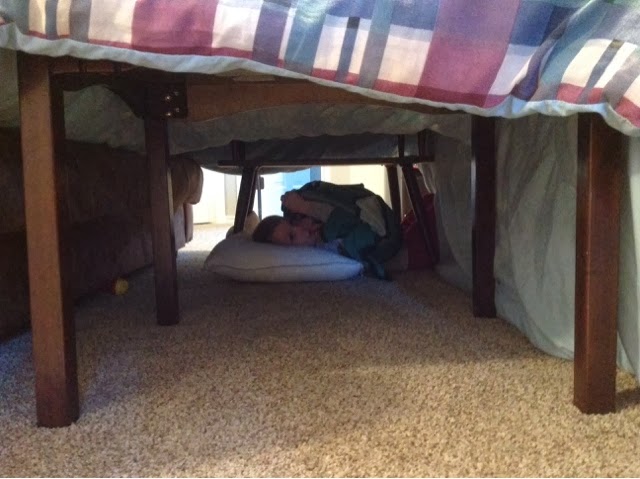
Once we finished watching the video, we talked about where bears hibernate. He told me in a cave, so we built a cave together with blankets in the basement.
He then went to his bedroom, found a pillow and a blanket and crawled in to "hibernate" for a while.
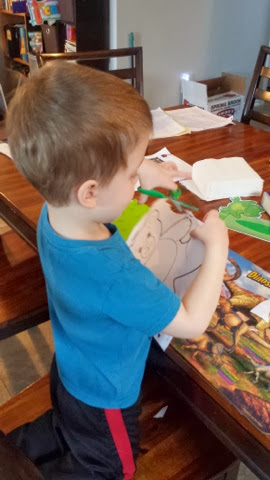
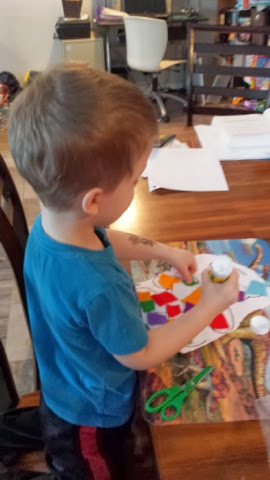
The next day, we made a collage bear. I found a simple pattern of a bear using Google Images, printed it out, gave him some scraps of felt and let him at it. He insisted that he cut out his bear first, so that was the first step. He then used a glue stick and glued on many colourful pieces of felt all over the bear.
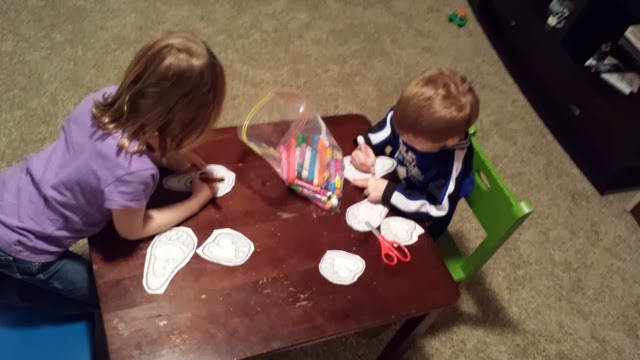
One day after my daughter came home from school, I gave them some photocopied bear prints, scissors and markers and told them to colour, create and cut out the bear prints. They worked together for about 30 minutes and then started to use their imagination to play with the footprints. They are still playing with these simple prints five days later. They made up a game of tag, did Yoga poses, hid them and even used them to guide each other through the basement to find a missing toy. I love their imaginations!
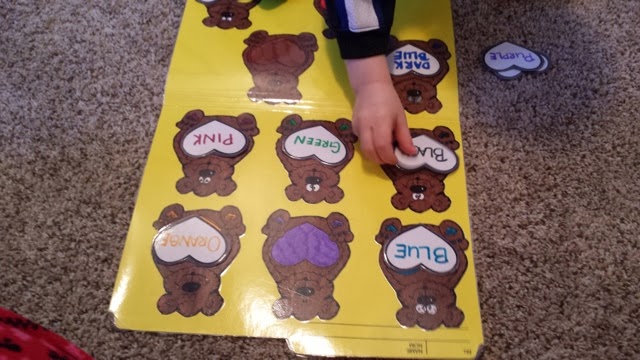
We are working on the simple colours first with my son. He knows them all, but I thought this would be a great place to start with colours so that he has 100% accuracy with one area, as he still struggles with printing and drawing shapes.
This was as simple file folder game. It was actually premade so I just had to pull it out of my collection. I'm not sure which book I got it from to be honest, otherwise I would post that information. If anyone knows, please comment so I can be sure to add that information!
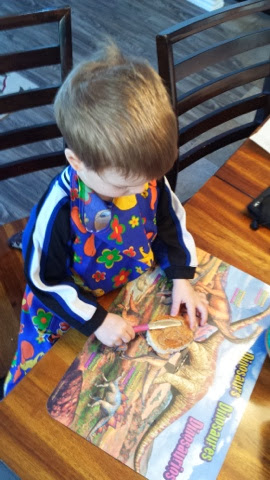
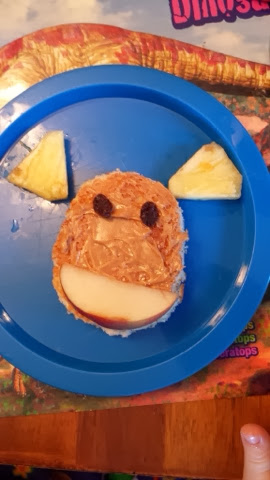
This was our cooking experience for the week. We made some toast and I cut it into a circle. I then put some globs of peanut butter on it and he used a small butter knife to spread it around. Next, he used some pineapple for the ears, raisins for the eyes and a piece of apple for the mouth. There are many different things you could use for the body parts (ex, bananas for the ears) but we used up what we had and it was so much fun!
This was another file folder game that I quickly made up. I found the idea on Pinterest, but when I clicked on the link there was only a picture. So I used a file folder and glued on a piece of blue construction paper for the pillow. I then found a picture of a teddy bear using Google Images and printed off 10. I then typed up the rhyme and 10 numbers and printed those off using Open Office Writer. This game was a hit! He even taught his sister how to play when she got home from school.
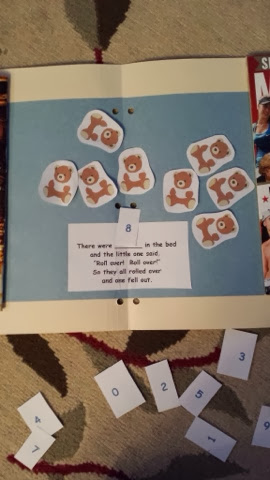
Want the simple words to the rhyme?
There were ______ in the bed
and the little one said,
"Roll over! Roll over!"
So they all rolled over
and one fell out.
Then at the end, we sing
There were 0 in the bed
and the little ones said,
"I'm cold! I miss you!"
So they all crawled into bed,
1,2,3,4,5,6,7,8,9,10
What a great week of Bears!
Friday, January 17, 2014
Hanging Kids Outside Clothes
In our old house, when the kids came inside - winter or summer - they always came in with wet clothes. I know this isn't going to change, in fact it's going to be worse because we actually have a yard now and the daycare children will be out as well. So I went to walmart and found a simple solution. A small hanging rack, hanging low enough so that the children can hang their OWN wet clothes.

And I also made sure I placed it right above the register so that the blowing air helps with the drying process! It works great and so simple! No more wet mittens on the register!

Thursday, January 16, 2014
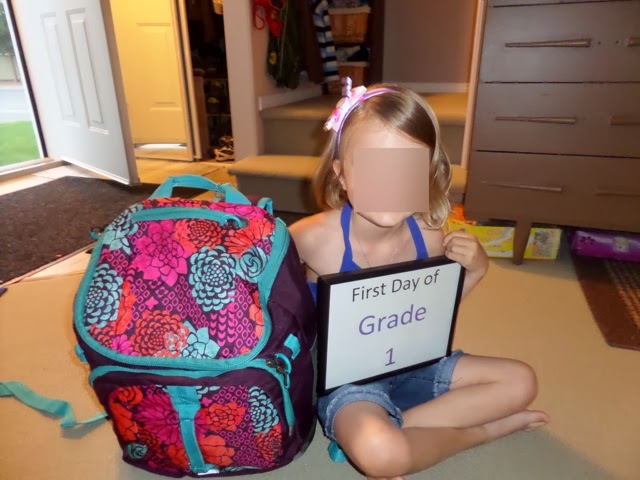
The First Day of School
I first made this sign last year for my daughters first day of kindergarten. This year, I made two signs - one for each of my kids! I have seen other ideas on Pinterest with what they want to be when they grow up and all other kinds of information, but I want these pictures to be just that. PICTURES. So simple. Quick. Leaving the information for the baby/school book pages.
Happy First Day of School Everyone!

Wednesday, January 15, 2014
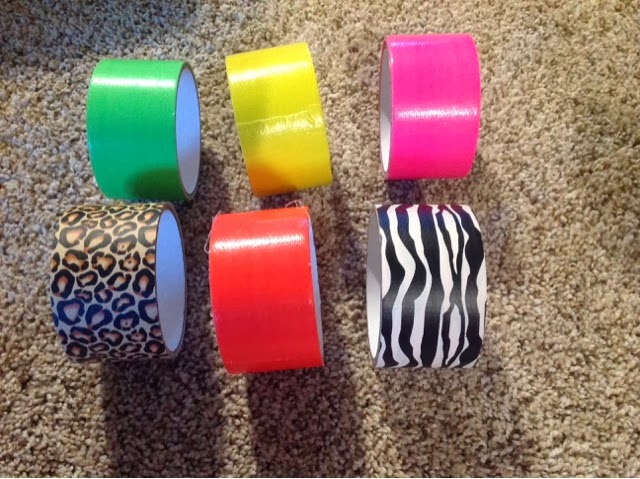
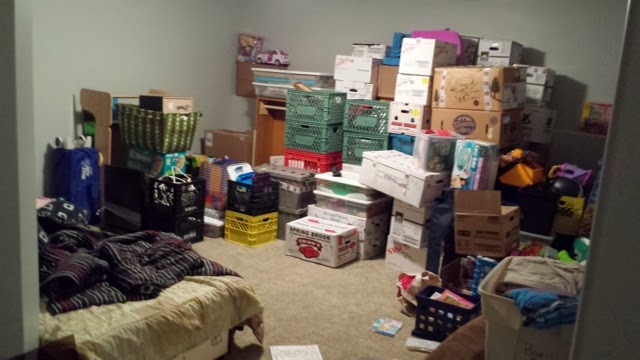
Packing to Move
I have moved many times in my life - usually as a university student in between semesters. My husband and I also moved overseas. We even moved from an apartment to a home with one child. But THIS, THIS was the worst move I have ever encountered. Two children. Two provinces. Two moves. Yes, two moves. We sold our house before we moved, so we had to move in with family for a month and keep all of our belongings in a storage locker. Have you ever seen Storage Wars? Ours would have been a jackpot!
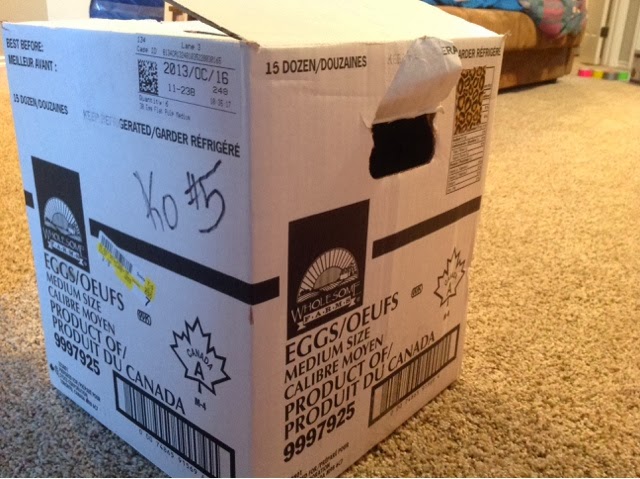
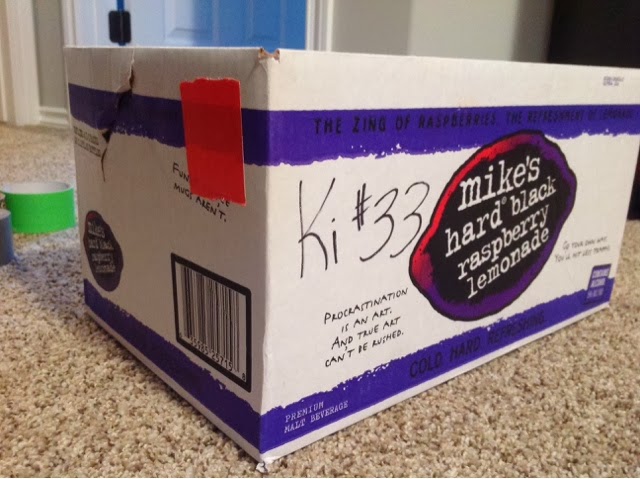
To help keep our lives as organized as possible, I found some duct tape at the Dollar Store that was a variety of colours. Each room was then assigned a colour. When packing, I would stick on a square of that rooms colour and mark the box with the first letter followed by a number. So a kitchen box would have orange tape and be marked K #5 or whatever number I was on. To keep track of all the boxes I used the State Farm Move Tools app on my iPad. This was a life saver because once we got all the boxes in, I was able to located items we needed. Like the coffee maker and filters for that first morning.
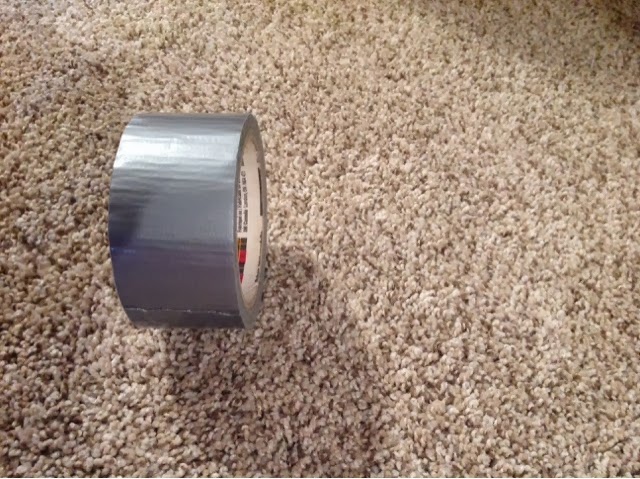
I also used regular silver duct tape to label the fragile boxes. When the movers (aka our family) saw this tape, they knew to be careful.
Here are some finished boxes with their tape and labels.
And here's just an example of the finished product once the uhaul was emptied.
And one more thing - don't EVER make another move without downloading this app . . .
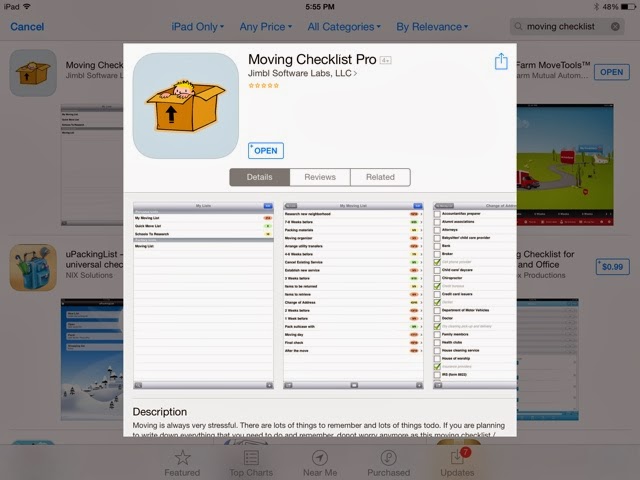
It was a lifesaver from day one! Thank you to the creators! You saved my life!
Tuesday, January 14, 2014
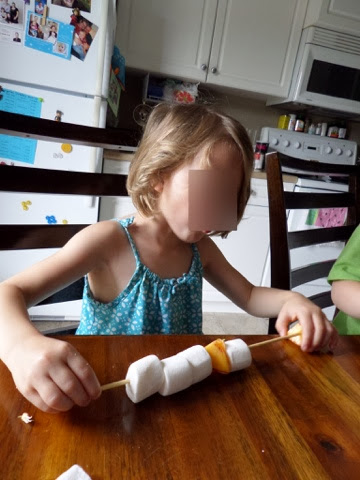
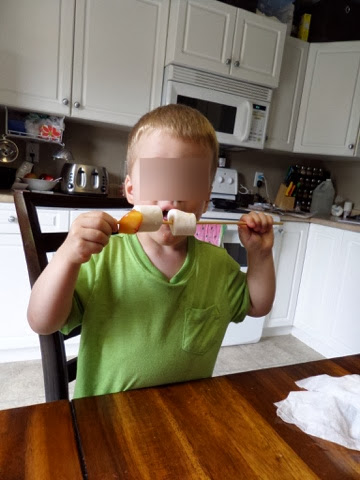
Kabobs for Kids
I have seen a few of these ideas on Pinterest. Brownie and fruit kabobs. Marshmallow and chocolate kabobs. All fruit kabobs. However, I'm not a cool mom like that, so chocolate was out, but we all need a LITTLE sugar, so marshmallows and fruit it is! This snack idea kept them busy for 30 minutes. 25 minutes to make them and 5 minutes to gobble them up. Small motor practice and a fun activity any time of year!
Monday, January 13, 2014
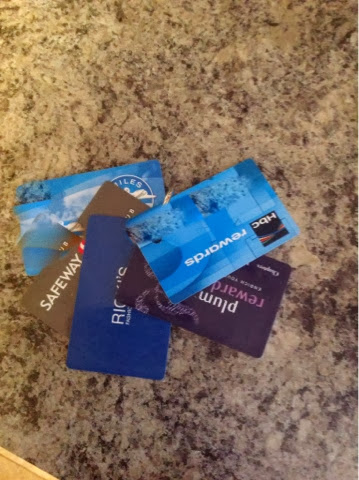
Member Cards
This idea is as simple as it looks. Genius. But simple.
Hole punch each card (in the same corner) and then use a circle clip to attach all of the cards together. This is a great way to keep all of your cards together but out of your wallet. Easy to access and find the card you are ACTUALLY looking for.
Thursday, January 09, 2014
Making Tracks with Masking Tape
This was a fun, rainy day activity for the kids. H was and still is really excited about cars, trucks and everything else that moves on four wheels. I used basic masking tape and made one long, windy road up, across and down the couch and car so the basement. The kids had fun for about 10 minutes and then they got bored and the tape started to peel up. If I ever did this activity again, it would be on a rug instead of a carpet and it would be on one straight surface, no more hills for us!

I'm Baaaack . . . .
Well, that was a long break I took there! A whole year! What happened? Life, that's what. A whole lot has changed in the past year. We took some awesome vacations, celebrated some big birthdays, moved to a new city, new province and a brand new home and started a brand new job - I'm now a stay at home mom, home schooling my preschooler and running a home daycare! My oldest is in the school system, but because of our situation, my son cannot attend preschool anymore and he misses his old preschool. So homeschooling it is. Just minimal, but still lots of fun! So hang tight, as most of these changes have happened in the past two weeks or are currently happening, but I am excited to get back to sharing all of my Pinterest projects with you!!
Hope you all had a great year while I was gone!
Subscribe to:
Posts (Atom)